
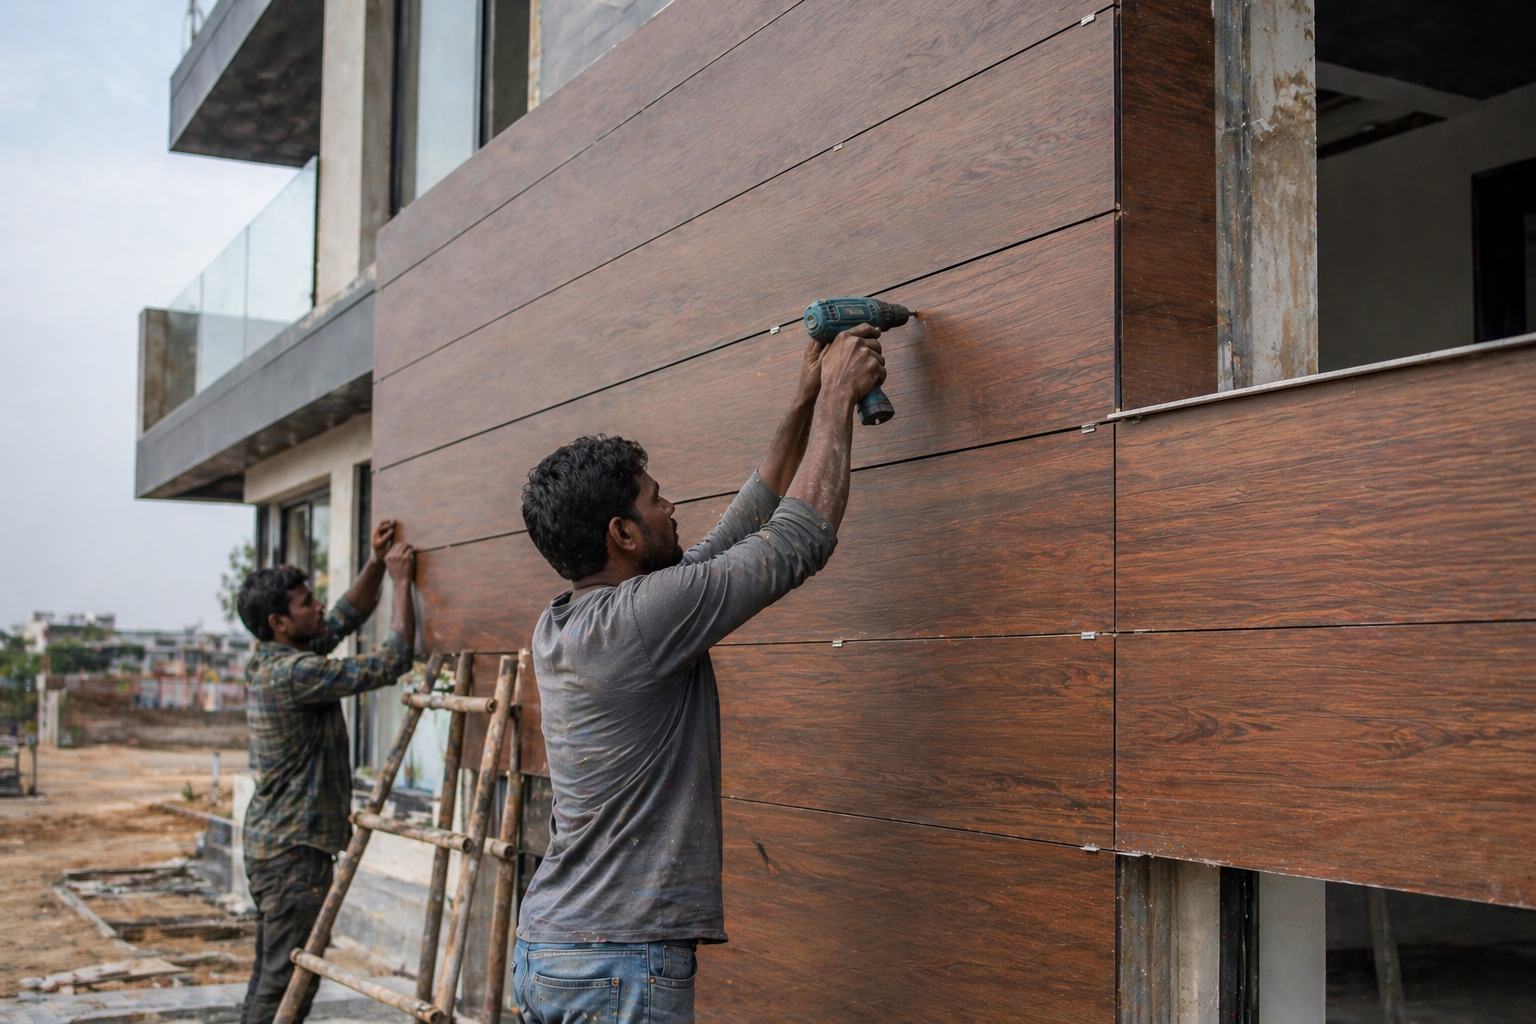
HPL cladding looks impressive on a finished building, but the quality of that result depends heavily on how the panels are installed. Even the best sheet will underperform if it is fixed poorly. Whether you are a homeowner wanting to understand the process or a builder planning a job, here is a clear, step-by-step overview of how HPL cladding is typically installed.
A quick word before you start
HPL cladding installation is best handled by experienced professionals. The overview below is meant to help you understand the process and ask good questions, not to replace skilled labour. Proper installation protects both the look and the lifespan of your facade, so it is not the place to cut corners.
Step 1: Plan and measure
Every good installation starts with careful planning. The wall area is measured accurately, panel layout is planned to minimise waste and joints, and the positions of openings, edges and fixings are worked out. Thinking through the layout in advance avoids awkward cuts and ensures the finished facade looks deliberate and balanced rather than patched together.
Step 2: Prepare the substructure
HPL panels are not usually fixed directly onto a raw wall. Instead, a supporting framework or substructure is installed first, commonly made of metal sections. This frame creates a level, stable base and, importantly, leaves a small cavity between the wall and the panels. That gap allows air to circulate and water to drain, which is essential for the long-term health of the facade.
Step 3: Set out the framework
The framework must be aligned and level, because any errors here will show up in the final panels. Vertical and horizontal members are positioned according to the panel layout, ensuring each sheet will have proper support along its edges and at fixing points. This stage is where precision pays off.
Step 4: Cut the panels
HPL sheets are cut to the required sizes using appropriate tools. Clean, accurate cuts matter both for appearance and for fit. Edges are handled carefully so the panels sit neatly against one another and around openings. Good cutting is a skill, and it makes a visible difference to the final quality.
Step 5: Fix the panels
The panels are then attached to the framework. Depending on the system, this is done with mechanical fixings such as rivets or screws, with adhesive bonding, or a combination of methods. Mechanical fixing with rivets is common for exterior facades because it is robust and allows for the slight movement materials naturally undergo with temperature changes. The chosen method should suit the application and follow the manufacturer’s guidance.
Step 6: Manage joints and gaps
Joints between panels are set out consistently, both for appearance and to accommodate thermal movement. Even, well-planned joints give the facade a clean, professional look. Where needed, edges and transitions around windows, corners and the base of the wall are finished neatly so the whole system reads as a coherent design.
Step 7: Final checks and cleaning
Once all panels are fixed, the installation is inspected for alignment, secure fixings and consistent joints. Any protective film is removed, and the surface is wiped clean. The result should be a flat, even, attractive facade with no loose panels or uneven gaps.
Why professional installation pays off
Done correctly, HPL cladding delivers years of weatherproof, low-maintenance performance. Done poorly, panels can loosen, joints can look messy, and water management can fail. Because the material itself is a long-term investment, it makes sense to have it installed by people who know the system well.
The bottom line
Installing HPL cladding follows a logical sequence: plan, prepare a proper substructure, set out the frame, cut and fix the panels, manage the joints, and finish cleanly. The ventilated cavity and quality fixings are what turn good panels into a great facade. Understanding this process helps you ensure your project is done right, and a good manufacturer can guide both you and your installer toward the best results.
Talk to HPL Maker
HPL Maker is one of India’s leading high pressure laminate manufacturers, based in Indore and trusted by architects, builders and homeowners across the country. Every sheet is backed by an industry-first up-to-25-year live camera warranty and complete local support. To get the right shade and the best price for your project, call +91 89824 90236 or write to marketing@hplmaker.com.