
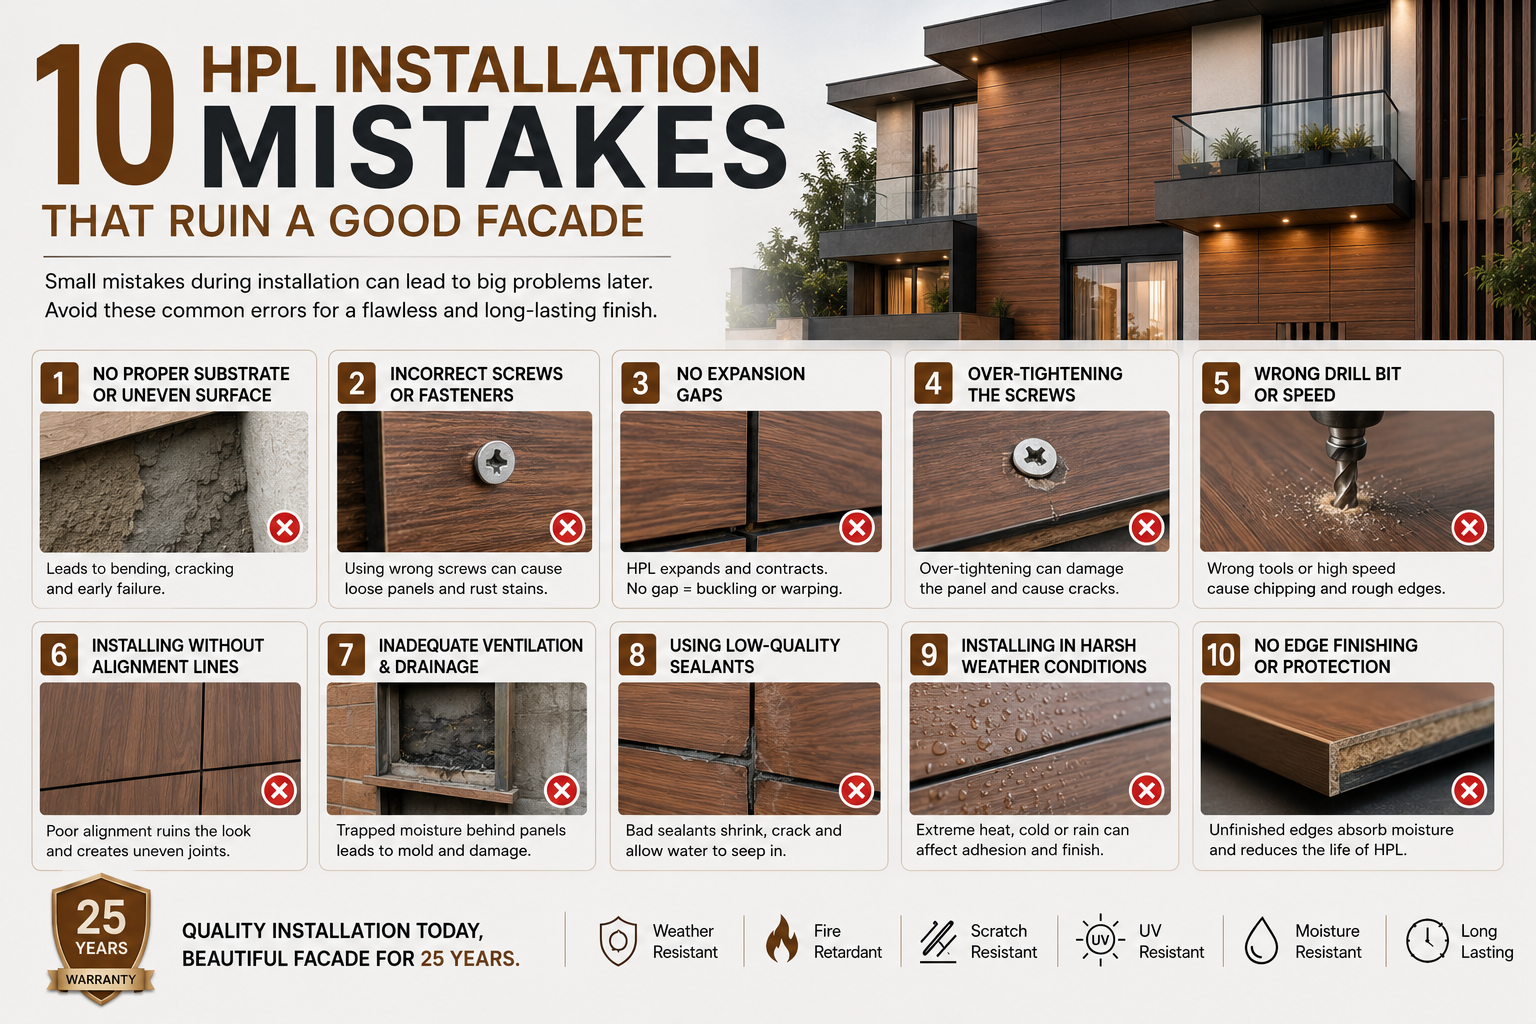
Quick answer: Exterior HPL is installed by fixing an aluminium sub-frame to the wall on adjustable brackets, levelling it to a true plane, then attaching panels with colour-matched rivets or concealed undercut anchors, leaving an 8-10mm ventilated joint. Panels must be allowed to expand, with one fixed point and slotted holes elsewhere.
Table of Contents
- Step 1: Survey and Set Out
- Step 2: Install Brackets and Sub-Frame
- Step 3: Prepare and Cut Panels
- Step 4: Fix the Panels
- Step 5: Joints, Corners and Quality Checks
- Frequently Asked Questions
Step 1: Survey and Set Out
Every good facade starts with an honest measurement. Walls are rarely plumb, corners are rarely square, and the drawing is rarely the building.
- Survey the elevation with a laser and record the worst deviation from plumb – this sets your minimum bracket projection.
- Mark datum lines at floor levels and at window heads and sills.
- Confirm the wall substrate and anchor type – RCC, solid block and hollow block all need different fixings.
- Set out the panel grid on the elevation drawing and confirm joint lines align across openings.
Step 2: Install Brackets and Sub-Frame
The sub-frame does the structural work. Panel failures almost always trace back to this stage.
- Fix L or U brackets to the wall with anchors rated for the calculated wind load and panel weight.
- Use a thermal break pad between bracket and wall where specified.
- Install vertical members plumb, then horizontal members level, checking the plane with a string line and laser at every bay.
- Keep member spacing within the panel manufacturer’s recommendation for the chosen thickness – typically around 600-700mm for 6mm HPL.
- Use aluminium or properly treated steel. Untreated mild steel will rust in Indian humidity and stain the panels.
Step 3: Prepare and Cut Panels
HPL cuts cleanly but only with the right tooling. Use carbide-tipped or diamond blades at high speed and low feed, support the panel fully to avoid chipping, and cut face up with a circular saw or face down on a panel saw depending on blade direction.
- Drill fixing holes oversized – typically panel hole diameter around 8-10mm for a 5mm rivet – so the panel can move.
- Round the internal corners of any cut-out with a minimum radius, never a sharp 90-degree notch, which becomes a crack origin.
- Deburr and clean all edges; exterior HPL does not require edge sealing but a clean edge looks better and cuts cleanly at joints.
- Keep panels stacked flat and covered until fixing, never leaned against a wall in the sun.
Step 4: Fix the Panels
| Method | How it works | Best for |
|---|---|---|
| Colour-matched rivets | Visible rivets through oversized holes into aluminium rails | Most common, economical, easy to service |
| Exposed screws | Screws with sealing washers into rails | Utility areas, temporary work |
| Undercut anchors | Concealed anchors set into the panel rear, hung on rails | Premium facades with no visible fixings |
| Adhesive systems | Structural adhesive with mechanical support | Specialist use, requires strict system compliance |
Whatever the method, the rule is the same: one fixed point per panel, every other hole slotted or oversized. HPL expands and contracts with temperature and humidity, and a panel pinned rigidly at all four corners will bow or crack.
Step 5: Joints, Corners and Quality Checks
Leave 8-10mm open joints between panels for exterior work, and follow the manufacturer’s figure for the panel size in use. Corners are formed either with a mitred profile or with an aluminium angle – decide before the elevation is set out, because it changes panel dimensions.
Final inspection checklist
- Panel faces flush and in one plane when checked with a string line.
- Joint widths consistent to within a couple of millimetres across the elevation.
- All rivets seated correctly, none over-tightened or pulled through.
- Cavity open at base and head, insect mesh in place.
- Protective film removed within the manufacturer’s recommended period, before it bakes onto the surface.
- Panels washed down and any site marks cleaned with a mild, non-abrasive cleaner.
Key Takeaways
- Survey the wall first; the worst deviation sets your bracket projection.
- The sub-frame carries the load – use aluminium or treated steel, never untreated MS.
- Oversize fixing holes and allow one fixed point per panel so the sheet can move.
- Keep member spacing within the manufacturer’s limit for the panel thickness.
- Leave 8-10mm open joints and keep the cavity ventilated at base and head.
Frequently Asked Questions
How is HPL sheet fixed to a wall?
Exterior HPL is fixed to an aluminium sub-frame that is mounted on adjustable brackets anchored to the wall. Panels are then attached with colour-matched rivets, exposed screws or concealed undercut anchors, with an open ventilated joint between panels.
Can HPL be glued directly to a wall?
Direct adhesive fixing to a masonry wall is not recommended for exterior facades. HPL moves with temperature and humidity and needs a ventilated cavity behind it, so a mechanically fixed sub-frame system is the correct approach.
What gap should be left between HPL panels?
Typically 8-10mm for exterior work, adjusted for panel size and the manufacturer’s stated movement allowance. Larger panels need larger joints because thermal movement scales with dimension.
How long does HPL installation take?
A trained two-person crew with the sub-frame already installed can typically fix a few hundred square feet of panelling per day on a straightforward elevation. Sub-frame installation and levelling usually takes longer than panel fixing.
Do HPL panels need edge sealing?
Exterior-grade HPL is a solid, low-absorption laminate and does not require edge sealing the way a particle board core would. Clean, square, deburred edges are still important for appearance and joint consistency.
Related Reading on HPL Maker
Talk to HPL Maker
HPL Maker is an Indian manufacturer of exterior-grade high pressure laminate with an industry-first live camera warranty of up to 25 years. Share your drawings or elevation photos and our team will suggest the right shade, thickness and fixing system for your project.
- Call / WhatsApp: +91 89824 90236
- Email: marketing@hplmaker.com
- Factory & Head Office: 124-126, Vrindavan Palace, Nipania Main Road, Vijay Nagar, Indore – 452010, Madhya Pradesh, India